|
NFS Server : Configure NFS Client (Server OS)
2017/01/18 |
|
Configure NFS Client (Windows Server OS).
This example is based on Windows Server 2012 R2.
|
|
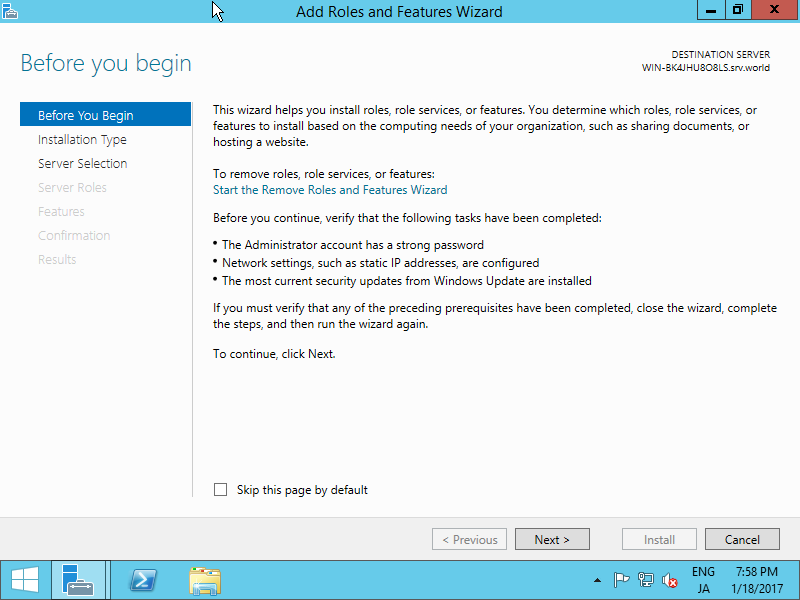
| [1] | Run Server Manager and Click [Add roles and features]. |

|
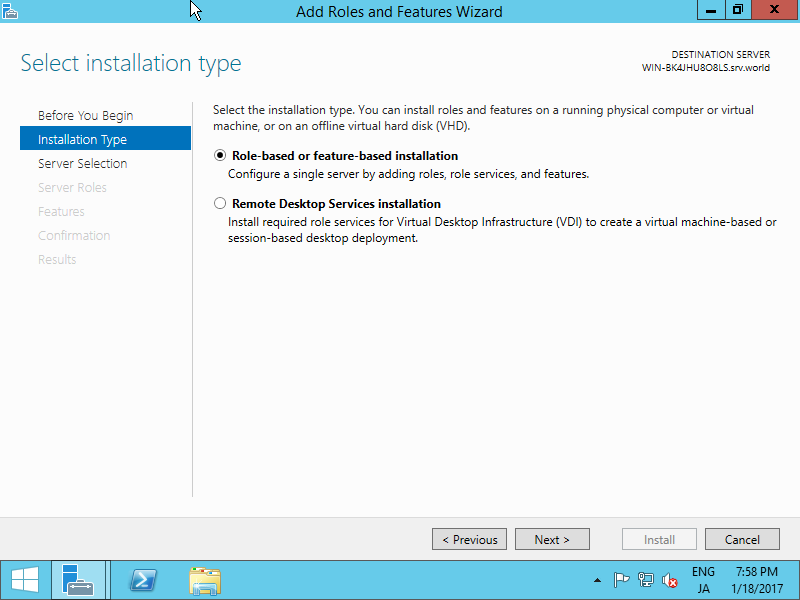
| [2] | Click [Next] button. |
|
| [3] | Select [Role-based or feature-based installation]. |
|
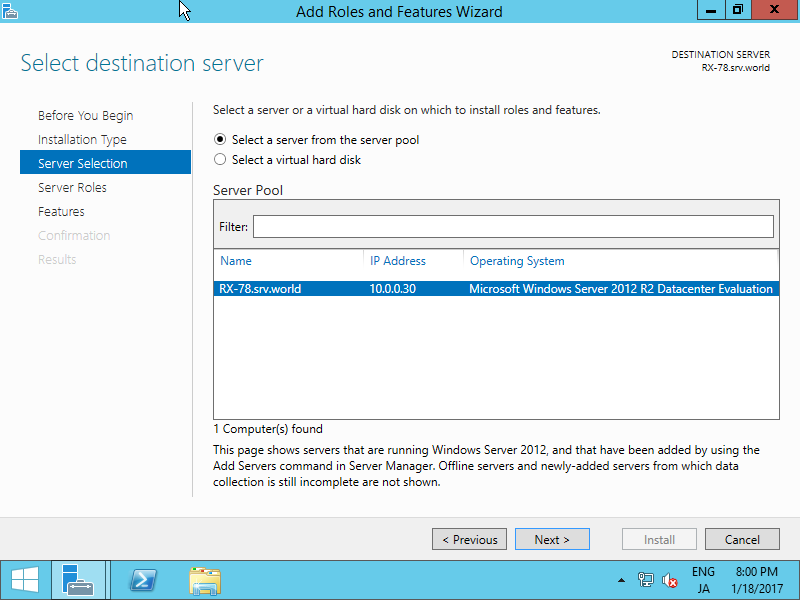
| [4] | Select a Host which you'd like to add services. |
|
| [5] | Click [Next] button. |

|
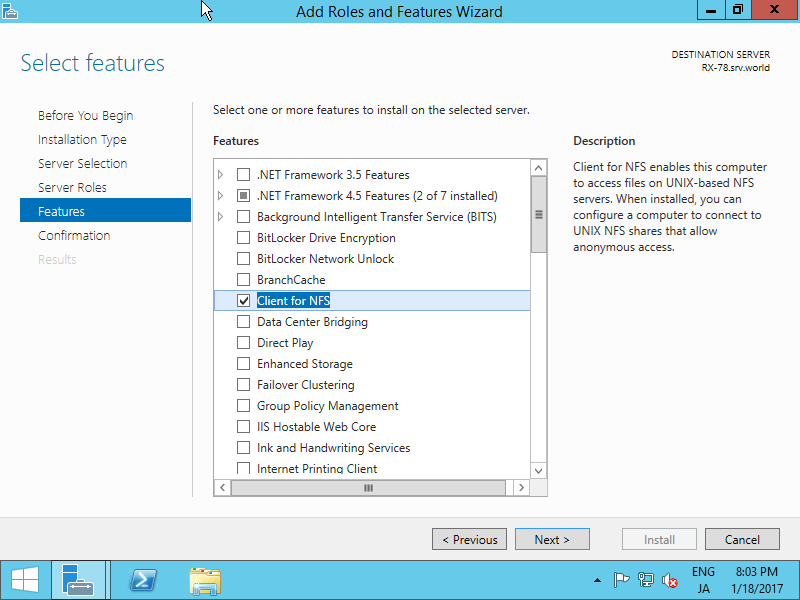
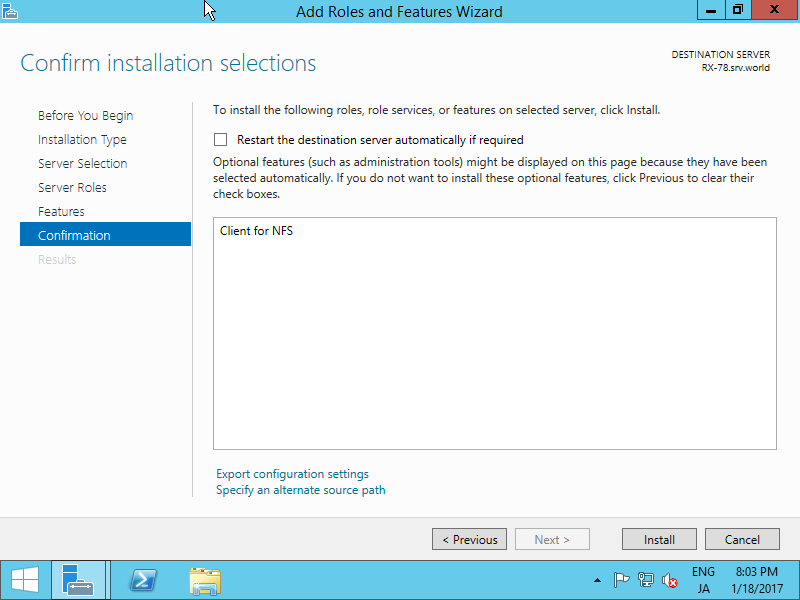
| [6] | Check a box [Client for NFS]. |
|
| [7] | Click [Install] button. |
|
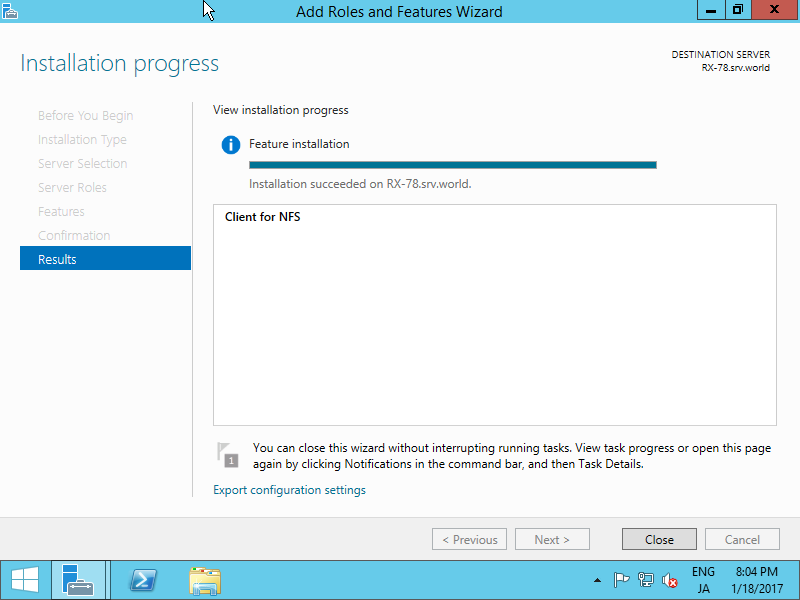
| [8] | After finishing Installation, click [Close] button. |
|
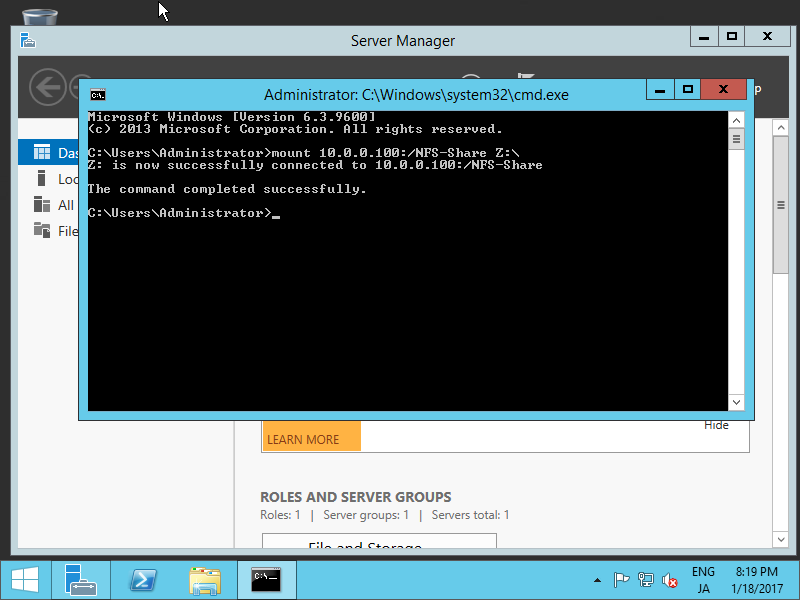
| [9] | Run Command Prompt and input commands like follows. ⇒ mount [NFS server's Hostname or IP address]:/[share name] [Local Drive to mount]:\ |
|
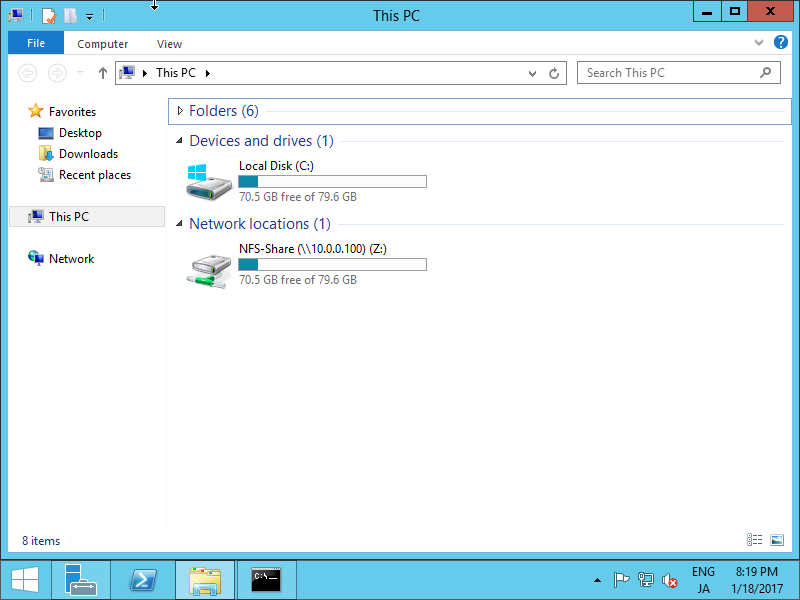
| [10] | Run Explorer, then NFS share folder is displayed. |
|
| [11] | It's possible to read/write files or folders by access control. |

|